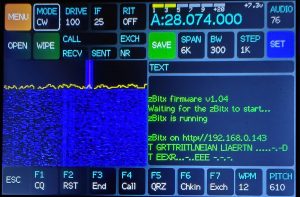
Working CW
In order to work CW,
- Choose the band you wish to operate on, by selecting it from the MENU.
- Set the AGC to slow. You can turn off the AGC when hunting for weak signals.
- Set the MODE to CW.
- Set the BW to 300Hz. You can set the bandwidth to 1KHz to hunt for weak stations and reduce it to 300Hz to reduce the noise and increase the readability of the signal.
- Set the STEP size to 100Hz. Using smaller step sizes reduces the chances of skipping past a weak station.
- Set the SPAN to 6KHz to narrow down the spectrum on the waterfall. Thisallows you to look for weak CW signals.
- Tap on the VFO and set the frequency you wish to operate on.
- Adjust the IF setting according to the prevailing band conditions. A high IF value results in overloading, while a very low IF value would result in poor sensitivity.
- Set the PITCH to your preference. Changing the pitch value moves the red line on the passband of the filter. The PITCH control determines the tone of the received signal and interacts with the bandwidth function. For example, if the pitch is set to 600 Hz and the BW is set to 200, you can hear from 500Hz to 700Hz (200Hz centered on 600Hz).
- If you are trying to work a station that is already transmitting, set the WPM value to a comfortable speed.
- If you wish to use the decoder function, center the blue passband strip on the waterfall display over the signal you wish to work by tuning into the signal. The decoder relies on the WPM setting to decode CW, so if it’s having trouble decoding, try to match the speed at which you think the other station is transmitting.
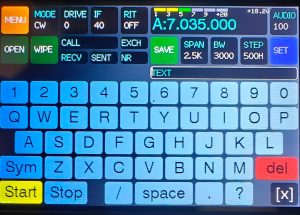
- In order to send CW, you can either use the onscreen keyboard, the preset macros, or use a paddle/straight key.
a. To use the onscreen keyboard, tap the TEXT field and input your message and press Start to begin sending the message.
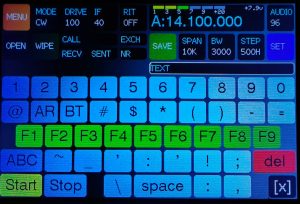
To send CW in real time, press Start before you begin typing the message. Press Sym to bring up the extended keyboard. Here you will find prosigns, punctuations, and symbols. To stop sending a message, press Stop.
b. To use the preset macros, press the button with the message you wish to send. You can also use the macro keys in the onscreen keyboard, by pressing the Sym button. The macros automatically fetch details such as callsign of the station, signal report, etc from the logger. If you want to halt transmission mid way, press the ESC button. This will also clear the text fields on the logger.
c. To use a paddle/ straight key, plug it into the key jack, set the CW INPUT in the SET menu and begin sending out your message. Follow the wiring diagram to connect your paddle/key to the zBitx using a standard 3.5mm TRS stereo jack.

13. If you are working a pileup, you can spread out overlapping callers over a few kilohertz by enabling the SPLIT option in the MENU. This allows you to set VFO A to a transmit frequency and VFO B to receive frequency. Now, when you send CW, the radio will transmit VFO A’s frequency and switch to VFO B on receive.