First time setup
When you receive your zBitx for the first time, you will have to set your callsign and grid for the logging and macro functions to work properly.
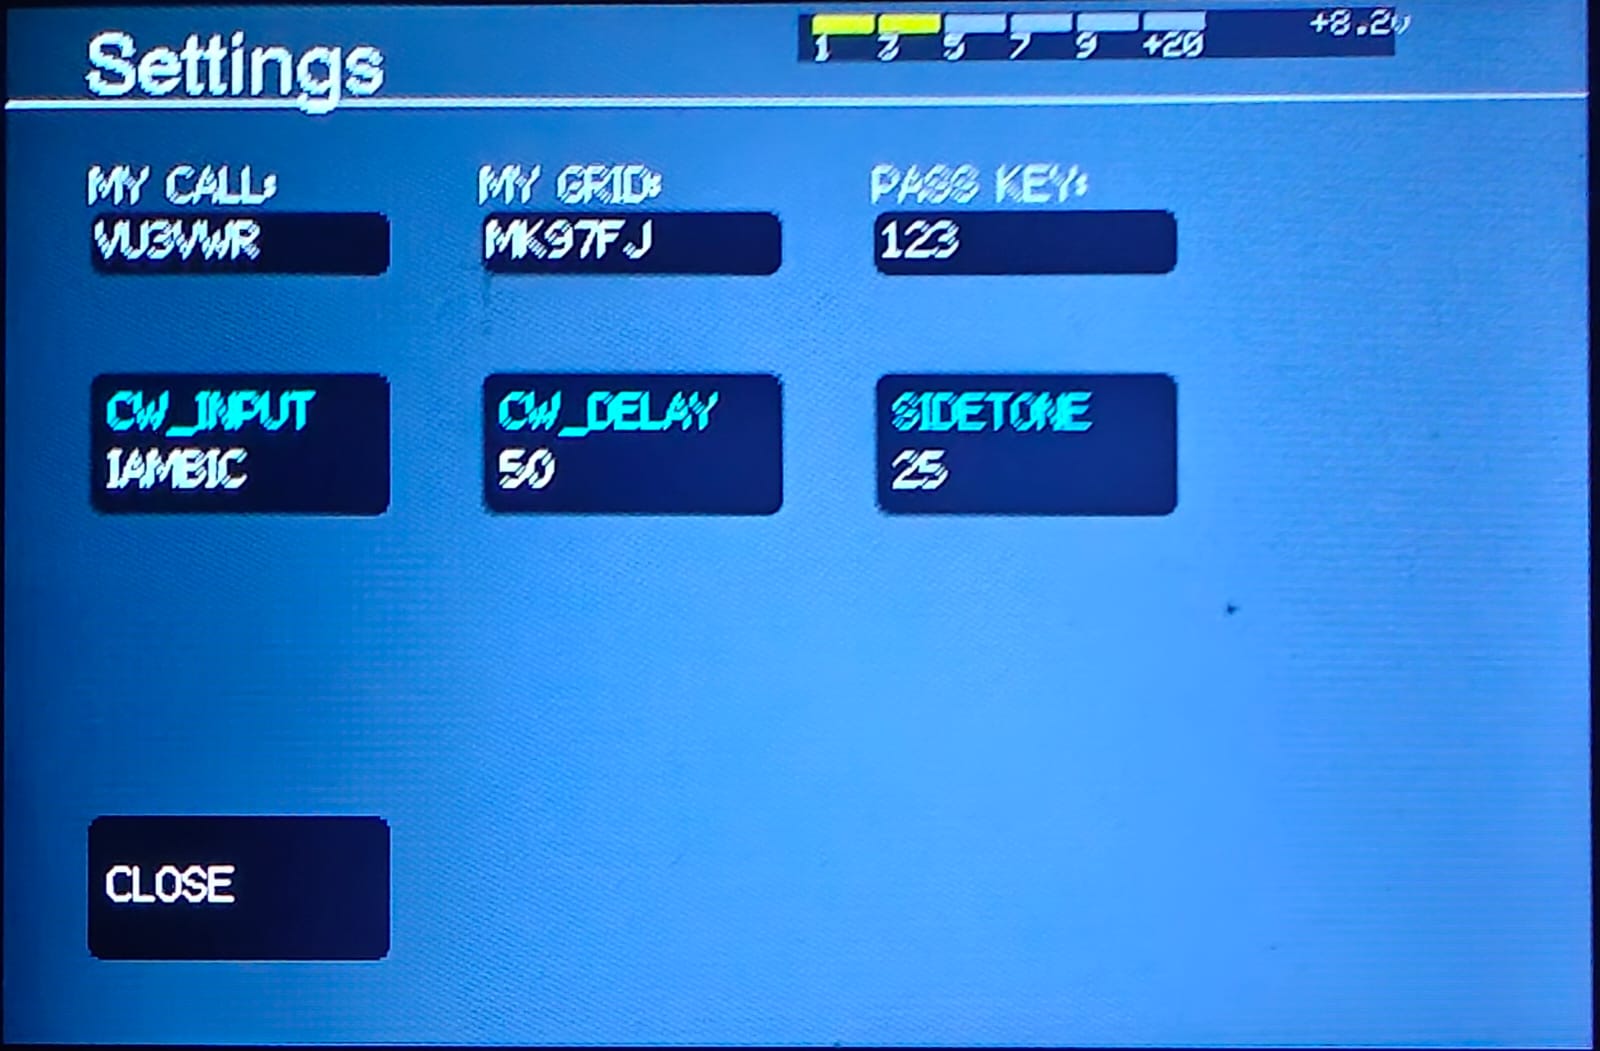
To do this, press the SET button on the top left of the front panel screen to bring up the settings menu.
- To enter your callsign, press the text field labelled MY CALL. This brings up the onscreen keyboard. Type in your callsign and press [x] to close the keyboard.
- Next, enter your grid locator by pressing on the text field labelled MY GRID. You can find your grid locator using a site like https://www.qrz.com/gridmapper.
- Once this is set, you can set the pass key for the web interface by tapping on the text field labelled PASS KEY. The default pass key is 123.
- If you plan to use a paddle or a straight key with your zBitx for sending CW, select the appropriate setting from the CW_INPUT option. You can either select Iambic, Iambic B, or Straight from the settings by either tapping once on the button to highlight it in white and rotating the knob, or by pressing on the button multiple times.
- If you wish to modify the time it takes for your zBitx to switch from transmit to receive on CW, adjust the CW_DELAY setting. The default value is 50 milliseconds.
- The SIDETONE setting controls the volume of the sidetone in CW and FT8 modes. Set this to a comfortable level if you wish to hear what you are sending. You can also lower this to zero if you don’t wish to hear the FT8 message you are transmitting.
- Press CLOSE to close the settings menu and return back to the main screen.