Operating USB/LSB/AM
To work USB/LSB/AM,
1. Choose the band you wish to operate on.
2. Set the frequency you intend to transmit on.
3. Set the mode to LSB/USB/AM. The convention is to use LSB below 10MHz and USB above 10MHz.
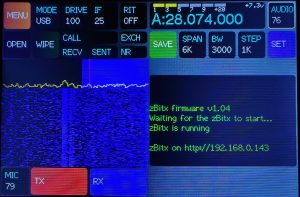
4. Set the BW to 2.5KHz. This is the standard SSB bandwidth of most commercial radios. You can reduce this if there is interference from stations near the operating frequency.
5. Set the SPAN to 25KHz or 10KHz, depending on how crowded the band is.
6. Set the STEP size to 1KHz if you wish to slowly tune across the band. You can set this to 10KHz to quickly scan a band.
7. Set the AGC to SLOW if the band is quiet. Set it to medium, if the band is noisy. You can also switch off the AGC if you are trying to copy a weak station.
8. If you plan to use an external microphone, plug it into the microphone jack on top of the radio.
9. Set the MIC gain depending on the operating environment. You can refer to the modulation monitor that appears above the waterfall to set the MIC gain. Set the gain so that the radio is modulating within the levels of the monitor when you’re speaking into the microphone. Higher values can result in distortion, so be careful not to set this too high.

10. Press the TX button to begin transmitting and speak into the microphone. The radio remains in TX until the RX button is pressed. This allows for hands-free operation.
11. When listening to a station working split or drifting in frequency, enable the RIT option by pressing the RIT button. Now you can change the RX frequency without changing the TX frequency.
12. If you are facing a pileup, you can spread out overlapping callers over a few kilohertz by enabling the SPLIT option in the MENU. This allows you to set VFO A to a transmit frequency and VFO B to receive frequency. Now, you press the TX button, the radio will transmit VFO A’s frequency and switch to VFO B on receive.
If you plan to use an external hand microphone, please ensure that the microphone and the PTT switch is wired as shown in the schematic below.
