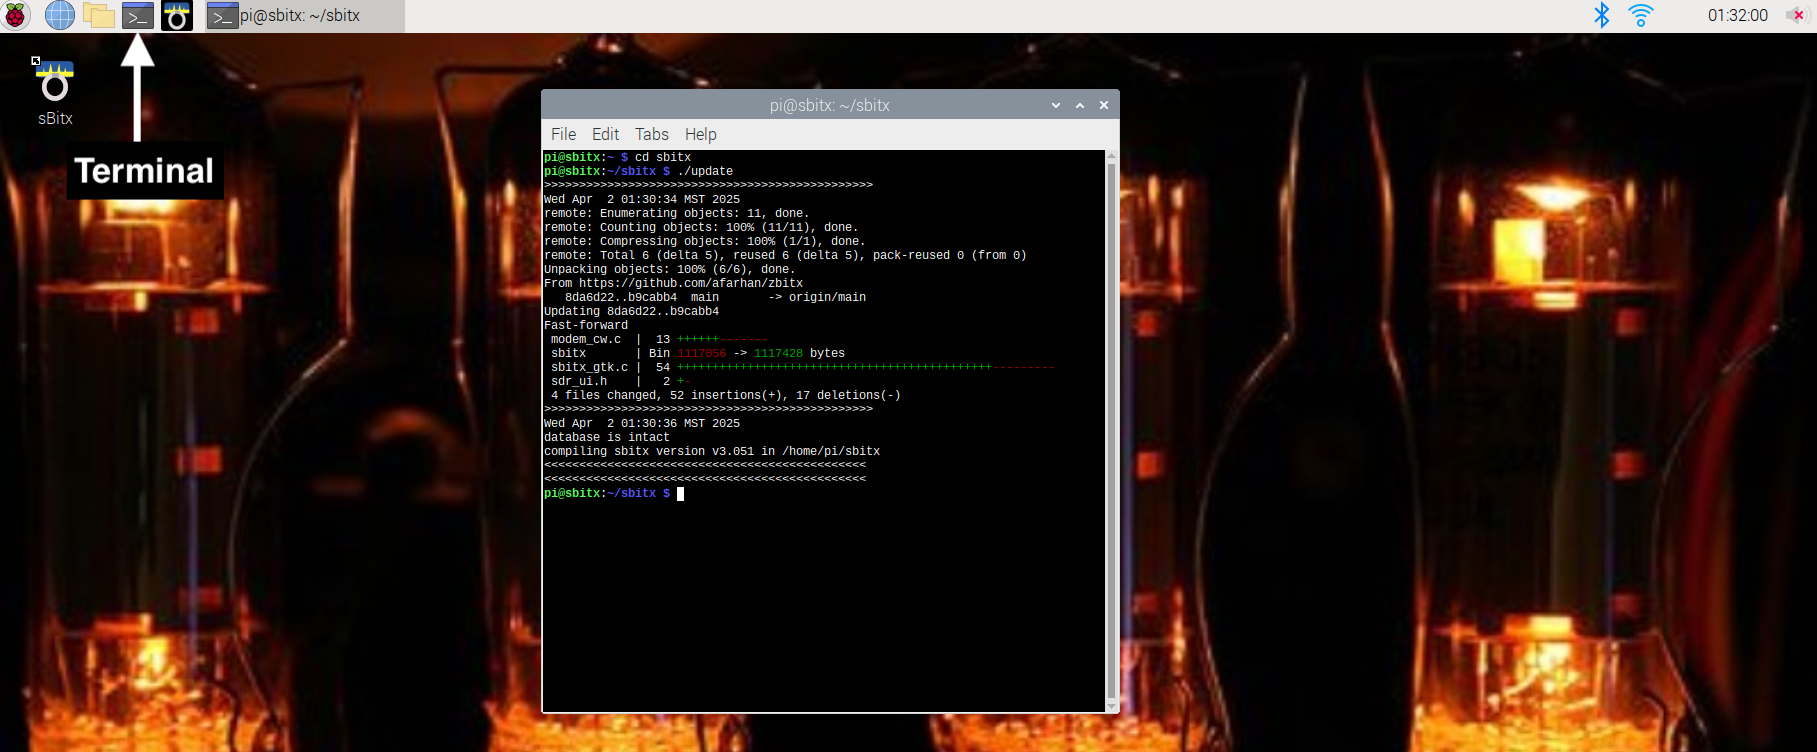
There are two parts on the zBitx that need to be updated for optimal performance – the Raspberry Pi Zero, which does the signal processing, and the Raspberry Pico, which interfaces between the Pi Zero and the front panel display and controls.
Let’s take a look at how to update your zBitx.
Updating the Pi Zero
1. To update the zBitx software on the Pi Zero, connect the radio to an external HDMI display and connect a keyboard and mouse via the USB port.
 2. Power up the zBitx and close all the open programs. Open the terminal program when the desktop environment loads. You can open the terminal by pressing on the terminal icon, or by pressing Ctrl+Shift+T.

3. In the terminal, type “cd sbitx” and press enter. Follow this up by typing “./update” to begin the update process.
Once the update process is completed, reboot the zBitx and the new software version should be displayed on the front panel display.
Updating the Pico
1. Download the Pico firmware file (uf2 file) to your computer from the zBitx product page (https://www.hfsignals.com/index.php/zbitx/).
2. Unplug the power to the zBitx.
3. While keeping the main knob button pressed, attach the supplied USB cable between the PC and the CAT port on the zBitx. Remember, you have to attach to the CAT port, not the one marked USB.

4. Now, let go of the knob. The zBitx display will light up with an all grey screen. The Pico controller will show up as a removable drive on your PC.
5. Copy the .uf2 firmware file from the PC to the Pico controller.
6. The Pico microcontroller is now updated. Remove the USB cable.
7. Restart the zBitx. The latest firmware should show up on the display.